Vincent Bernat: Syncing NetBox with a custom Ansible module
The
However, if NetBox is not your source of truth, you may want to
ensure it stays in sync with your configuration management
database1 by removing outdated devices or IP addresses. While it
should be possible to glue together a playbook with a query, a loop
and some filtering to delete unwanted elements, it feels clunky,
inefficient and an abuse of YAML as a programming language. A specific
Ansible module solves this issue and is likely more flexible.
Code
The module has the following signature and it syncs NetBox with
the content of the provided YAML file:
netbox.netbox collection from Ansible Galaxy
provides several modules to update NetBox objects:
- name: create a device in NetBox
  netbox_device:
    netbox_url: http://netbox.local
    netbox_token: s3cret
    data:
      name: to3-p14.sfo1.example.com
      device_type: QFX5110-48S
      device_role: Compute Switch
      site: SFO1
Notice I recommend that you read Writing a custom Ansible module as an introduction, as well as Syncing MySQL tables for a first simpler example.
Code
The module has the following signature and it syncs NetBox with
the content of the provided YAML file:
netbox_sync:
  source: netbox.yaml
  api: https://netbox.example.com
  token: s3cret
The synchronized objects are:
- sites,
- manufacturers,
- device types,
- device roles,
- devices, and
- IP addresses.
In our environment, the YAML file is generated from our configuration
management database and contains a set of devices and a list of IP
addresses:
devices:
  ad2-p6.sfo1.example.com:
     datacenter: sfo1
     manufacturer: Cisco
     model: Catalyst 2960G-48TC-L
     role: net_tor_oob_switch
  to1-p6.sfo1.example.com:
     datacenter: sfo1
     manufacturer: Juniper
     model: QFX5110-48S
     role: net_tor_gpu_switch
# [ ]
ips:
  - device: ad2-p6.example.com
    ip: 172.31.115.18/21
    interface: oob
  - device: to1-p6.example.com
    ip: 172.31.115.33/21
    interface: oob
  - device: to1-p6.example.com
    ip: 172.31.254.33/32
    interface: lo0.0
# [ ]
The network team is not the sole tenant in NetBox. While adding new
objects or modifying existing ones should be relatively safe, deleting
unwanted objects can be risky. The module only deletes objects it did
create or modify. To identify them, it marks them with a specific tag,
cmdb. Most objects in NetBox accept tags.
Module definition
Starting from the skeleton described in the previous article, we define the module:
module_args = dict(
    source=dict(type='path', required=True),
    api=dict(type='str', required=True),
    token=dict(type='str', required=True, no_log=True),
    max_workers=dict(type='int', required=False, default=10)
)
result = dict(
    changed=False
)
module = AnsibleModule(
    argument_spec=module_args,
    supports_check_mode=True
)
It contains an additional optional arguments defining the number of
workers to talk to NetBox and query the existing objects in parallel
to speedup the execution.
Abstracting synchronization
We need to synchronize different object types, but once we have a list
of objects we want in NetBox, the grunt work is always the same:
- check if the objects already exist,
- retrieve them and put them in a form suitable for comparison,
- retrieve the extra objects we don t want anymore,
- compare the two sets, and
- add missing objects, update existing ones, delete extra ones.
We code these behaviours into a Synchronizer abstract class. For
each kind of object, a concrete class is built with the appropriate
class attributes to tune its behaviour and a wanted() method to
provide the objects we want.
I am not explaining the abstract class code here. Have a look at the
source if you want.
Synchronizing tags and tenants
As a starter, here is how we define the class synchronizing the tags:
class SyncTags(Synchronizer):
    app = "extras"
    table = "tags"
    key = "name"
    def wanted(self):
        return  "cmdb": dict(
            slug="cmdb",
            color="8bc34a",
            description="synced by network CMDB")
The app and table attributes defines the NetBox objects we want
to manipulate. The key attribute is used to determine how to lookup
for existing objects. In this example, we want to lookup tags using
their names.
The wanted() method is expected to return a dictionary mapping
object keys to the list of wanted attributes. Here, the keys are tag
names and we create only one tag, cmdb, with the provided slug,
color and description. This is the tag we will use to mark the objects
we create or modify.
If the tag does not exist, it is created. If it exists, the provided
attributes are updated. Other attributes are left untouched.
We also want to create a specific tenant for objects accepting such an
attribute (devices and IP addresses):
class SyncTenants(Synchronizer):
    app = "tenancy"
    table = "tenants"
    key = "name"
    def wanted(self):
        return  "Network": dict(slug="network",
                                description="Network team")
Synchronizing sites
We also need to synchronize the list of sites. This time, the
wanted() method uses the information provided in the YAML file: it
walks the devices and builds a set of datacenter names.
class SyncSites(Synchronizer):
    app = "dcim"
    table = "sites"
    key = "name"
    only_on_create = ("status", "slug")
    def wanted(self):
        result = set(details["datacenter"]
                     for details in self.source['devices'].values()
                     if "datacenter" in details)
        return  k: dict(slug=k,
                        status="planned")
                for k in result
Thanks to the use of the only_on_create attribute, the specified
attributes are not updated if they are different. The goal of this
synchronizer is mostly to collect the references to the different
sites for other objects.
>>> pprint(SyncSites(**sync_args).wanted())
 'sfo1':  'slug': 'sfo1', 'status': 'planned' ,
 'chi1':  'slug': 'chi1', 'status': 'planned' ,
 'nyc1':  'slug': 'nyc1', 'status': 'planned'
Synchronizing manufacturers, device types and device roles
The synchronization of manufacturers is pretty similar, except we do
not use the only_on_create attribute:
class SyncManufacturers(Synchronizer):
    app = "dcim"
    table = "manufacturers"
    key = "name"
    def wanted(self):
        result = set(details["manufacturer"]
                     for details in self.source['devices'].values()
                     if "manufacturer" in details)
        return  k:  "slug": slugify(k)
                for k in result
Regarding the device types, we use the foreign attribute linking
a NetBox attribute to the synchronizer handling it.
class SyncDeviceTypes(Synchronizer):
    app = "dcim"
    table = "device_types"
    key = "model"
    foreign =  "manufacturer": SyncManufacturers
    def wanted(self):
        result = set((details["manufacturer"], details["model"])
                     for details in self.source['devices'].values()
                     if "model" in details)
        return  k[1]: dict(manufacturer=k[0],
                           slug=slugify(k[1]))
                for k in result
The wanted() method refers to the manufacturer using its key
attribute. In this case, this is the manufacturer name.
>>> pprint(SyncManufacturers(**sync_args).wanted())
 'Cisco':  'slug': 'cisco' ,
 'Dell':  'slug': 'dell' ,
 'Juniper':  'slug': 'juniper'
>>> pprint(SyncDeviceTypes(**sync_args).wanted())
 'ASR 9001':  'manufacturer': 'Cisco', 'slug': 'asr-9001' ,
 'Catalyst 2960G-48TC-L':  'manufacturer': 'Cisco',
                           'slug': 'catalyst-2960g-48tc-l' ,
 'MX10003':  'manufacturer': 'Juniper', 'slug': 'mx10003' ,
 'QFX10002-36Q':  'manufacturer': 'Juniper', 'slug': 'qfx10002-36q' ,
 'QFX10002-72Q':  'manufacturer': 'Juniper', 'slug': 'qfx10002-72q' ,
 'QFX5110-32Q':  'manufacturer': 'Juniper', 'slug': 'qfx5110-32q' ,
 'QFX5110-48S':  'manufacturer': 'Juniper', 'slug': 'qfx5110-48s' ,
 'QFX5200-32C':  'manufacturer': 'Juniper', 'slug': 'qfx5200-32c' ,
 'S4048-ON':  'manufacturer': 'Dell', 'slug': 's4048-on' ,
 'S6010-ON':  'manufacturer': 'Dell', 'slug': 's6010-on'
The device roles are defined like this:
class SyncDeviceRoles(Synchronizer):
    app = "dcim"
    table = "device_roles"
    key = "name"
    def wanted(self):
        result = set(details["role"]
                     for details in self.source['devices'].values()
                     if "role" in details)
        return  k: dict(slug=slugify(k),
                        color="8bc34a")
                for k in result
Synchronizing devices
A device is mostly a name with references to a role, a model, a
datacenter and a tenant. These references are declared as foreign keys
using the synchronizers defined previously.
class SyncDevices(Synchronizer):
    app = "dcim"
    table = "devices"
    key = "name"
    foreign =  "device_role": SyncDeviceRoles,
               "device_type": SyncDeviceTypes,
               "site": SyncSites,
               "tenant": SyncTenants
    remove_unused = 10
    def wanted(self):
        return  name: dict(device_role=details["role"],
                           device_type=details["model"],
                           site=details["datacenter"],
                           tenant="Network")
                for name, details in self.source['devices'].items()
                if  "datacenter", "model", "role"  <= set(details.keys())
The remove_unused attribute is a safety implemented to fail if we
have to delete more than 10 devices: this may be the indication there
is a bug somewhere, unless one of your datacenter suddenly caught
fire.
>>> pprint(SyncDevices(**sync_args).wanted())
 'ad2-p6.sfo1.example.com':  'device_role': 'net_tor_oob_switch',
                             'device_type': 'Catalyst 2960G-48TC-L',
                             'site': 'sfo1',
                             'tenant': 'Network' ,
 'to1-p6.sfo1.example.com':  'device_role': 'net_tor_gpu_switch',
                             'device_type': 'QFX5110-48S',
                             'site': 'sfo1',
                             'tenant': 'Network' ,
[ ]
Synchronizing IP addresses
The last step is to synchronize IP addresses. We do not attach them to
a device.2 Instead, we specify the device names in the
description of the IP address:
class SyncIPs(Synchronizer):
    app = "ipam"
    table = "ip-addresses"
    key = "address"
    foreign =  "tenant": SyncTenants
    remove_unused = 1000
    def wanted(self):
        wanted =
        for details in self.source['ips']:
            if details['ip'] in wanted:
                wanted[details['ip']]['description'] = \
                    f" details['device']  (and others)"
            else:
                wanted[details['ip']] = dict(
                    tenant="Network",
                    status="active",
                    dns_name="",        # information is present in DNS
                    description=f" details['device'] :  details['interface'] ",
                    role=None,
                    vrf=None)
        return wanted
There is a slight difficulty: NetBox allows duplicate IP addresses,
so a simple lookup is not enough. In case of multiple matches, we
choose the best by preferring those tagged with cmdb, then those
already attached to an interface:
def get(self, key):
    """Grab IP address from NetBox."""
    # There may be duplicate. We need to grab the "best".
    results = super(Synchronizer, self).get(key)
    if len(results) == 0:
        return None
    if len(results) == 1:
        return results[0]
    scores = [0]*len(results)
    for idx, result in enumerate(results):
        if "cmdb" in result.tags:
            scores[idx] += 10
        if result.interface is not None:
            scores[idx] += 5
    return sorted(zip(scores, results),
                  reverse=True, key=lambda k: k[0])[0][1]
Getting the current and wanted states
Each synchronizer is initialized with a reference to the Ansible
module, a reference to a pynetbox s API object, the data contained
in the provided YAML file and two empty dictionaries for the current
and expected states:
source = yaml.safe_load(open(module.params['source']))
netbox = pynetbox.api(module.params['api'],
                      token=module.params['token'])
sync_args = dict(
    module=module,
    netbox=netbox,
    source=source,
    before= ,
    after=
)
synchronizers = [synchronizer(**sync_args) for synchronizer in [
    SyncTags,
    SyncTenants,
    SyncSites,
    SyncManufacturers,
    SyncDeviceTypes,
    SyncDeviceRoles,
    SyncDevices,
    SyncIPs
]]
Each synchronizer has a prepare() method whose goal is to compute
the current and wanted states. It returns True in case of a
difference:
# Check what needs to be synchronized
try:
    for synchronizer in synchronizers:
        result['changed']  = synchronizer.prepare()
except AnsibleError as e:
    result['msg'] = e.message
    module.fail_json(**result)
Applying changes
Back to the skeleton described in the previous article, the last step is to apply the changes if there
is a difference between these states. Each synchronizer registers the
current and wanted states in sync_args["before"][table] and
sync_args["after"][table] where table is the name of the table for
a given NetBox object type. The diff object is a bit elaborate as
it is built table by table. This enables Ansible to display the name
of each table before the diff representation:
# Compute the diff
if module._diff and result['changed']:
    result['diff'] = [
        dict(
            before_header=table,
            after_header=table,
            before=yaml.safe_dump(sync_args["before"][table]),
            after=yaml.safe_dump(sync_args["after"][table]))
        for table in sync_args["after"]
        if sync_args["before"][table] != sync_args["after"][table]
    ]
# Stop here if check mode is enabled or if no change
if module.check_mode or not result['changed']:
    module.exit_json(**result)
Each synchronizer also exposes a synchronize() method to apply
changes and a cleanup() method to delete unwanted objects. Order is
important due to the relation between the objects.
# Synchronize
for synchronizer in synchronizers:
    synchronizer.synchronize()
for synchronizer in synchronizers[::-1]:
    synchronizer.cleanup()
module.exit_json(**result)
The complete code is available on GitHub. Compared to using
netbox.netbox collection, the logic is written in
Python instead of trying to glue Ansible tasks together. I believe
this is both more flexible and easier to read, notably when trying to
delete outdated objects. While I did not test it, it should also be
faster. An alternative would have been to reuse code from the
netbox.netbox collection, as it contains similar primitives.
Unfortunately, I didn t think of it until now.
-
In my opinion, a good option for a source of truth is to
use YAML files in a Git repository. You get versioning for free
and people can get started with a text editor.
-
This limitation is mostly due to laziness: we do not
really care about this information. Our main motivation for
putting IP addresses in NetBox is to keep track of the used IP
addresses. However, if an IP address is already attached to an
interface, we leave this association untouched.
netbox_sync: source: netbox.yaml api: https://netbox.example.com token: s3cret
devices: ad2-p6.sfo1.example.com: datacenter: sfo1 manufacturer: Cisco model: Catalyst 2960G-48TC-L role: net_tor_oob_switch to1-p6.sfo1.example.com: datacenter: sfo1 manufacturer: Juniper model: QFX5110-48S role: net_tor_gpu_switch # [ ] ips: - device: ad2-p6.example.com ip: 172.31.115.18/21 interface: oob - device: to1-p6.example.com ip: 172.31.115.33/21 interface: oob - device: to1-p6.example.com ip: 172.31.254.33/32 interface: lo0.0 # [ ]
module_args = dict( source=dict(type='path', required=True), api=dict(type='str', required=True), token=dict(type='str', required=True, no_log=True), max_workers=dict(type='int', required=False, default=10) ) result = dict( changed=False ) module = AnsibleModule( argument_spec=module_args, supports_check_mode=True )
Abstracting synchronization
We need to synchronize different object types, but once we have a list
of objects we want in NetBox, the grunt work is always the same:
- check if the objects already exist,
- retrieve them and put them in a form suitable for comparison,
- retrieve the extra objects we don t want anymore,
- compare the two sets, and
- add missing objects, update existing ones, delete extra ones.
We code these behaviours into a Synchronizer abstract class. For
each kind of object, a concrete class is built with the appropriate
class attributes to tune its behaviour and a wanted() method to
provide the objects we want.
I am not explaining the abstract class code here. Have a look at the
source if you want.
Synchronizing tags and tenants
As a starter, here is how we define the class synchronizing the tags:
class SyncTags(Synchronizer):
app = "extras"
table = "tags"
key = "name"
def wanted(self):
return "cmdb": dict(
slug="cmdb",
color="8bc34a",
description="synced by network CMDB")
The app and table attributes defines the NetBox objects we want
to manipulate. The key attribute is used to determine how to lookup
for existing objects. In this example, we want to lookup tags using
their names.
The wanted() method is expected to return a dictionary mapping
object keys to the list of wanted attributes. Here, the keys are tag
names and we create only one tag, cmdb, with the provided slug,
color and description. This is the tag we will use to mark the objects
we create or modify.
If the tag does not exist, it is created. If it exists, the provided
attributes are updated. Other attributes are left untouched.
We also want to create a specific tenant for objects accepting such an
attribute (devices and IP addresses):
class SyncTenants(Synchronizer):
app = "tenancy"
table = "tenants"
key = "name"
def wanted(self):
return "Network": dict(slug="network",
description="Network team")
Synchronizing sites
We also need to synchronize the list of sites. This time, the
wanted() method uses the information provided in the YAML file: it
walks the devices and builds a set of datacenter names.
class SyncSites(Synchronizer):
app = "dcim"
table = "sites"
key = "name"
only_on_create = ("status", "slug")
def wanted(self):
result = set(details["datacenter"]
for details in self.source['devices'].values()
if "datacenter" in details)
return k: dict(slug=k,
status="planned")
for k in result
Thanks to the use of the only_on_create attribute, the specified
attributes are not updated if they are different. The goal of this
synchronizer is mostly to collect the references to the different
sites for other objects.
>>> pprint(SyncSites(**sync_args).wanted())
'sfo1': 'slug': 'sfo1', 'status': 'planned' ,
'chi1': 'slug': 'chi1', 'status': 'planned' ,
'nyc1': 'slug': 'nyc1', 'status': 'planned'
Synchronizing manufacturers, device types and device roles
The synchronization of manufacturers is pretty similar, except we do
not use the only_on_create attribute:
class SyncManufacturers(Synchronizer):
app = "dcim"
table = "manufacturers"
key = "name"
def wanted(self):
result = set(details["manufacturer"]
for details in self.source['devices'].values()
if "manufacturer" in details)
return k: "slug": slugify(k)
for k in result
Regarding the device types, we use the foreign attribute linking
a NetBox attribute to the synchronizer handling it.
class SyncDeviceTypes(Synchronizer):
app = "dcim"
table = "device_types"
key = "model"
foreign = "manufacturer": SyncManufacturers
def wanted(self):
result = set((details["manufacturer"], details["model"])
for details in self.source['devices'].values()
if "model" in details)
return k[1]: dict(manufacturer=k[0],
slug=slugify(k[1]))
for k in result
The wanted() method refers to the manufacturer using its key
attribute. In this case, this is the manufacturer name.
>>> pprint(SyncManufacturers(**sync_args).wanted())
'Cisco': 'slug': 'cisco' ,
'Dell': 'slug': 'dell' ,
'Juniper': 'slug': 'juniper'
>>> pprint(SyncDeviceTypes(**sync_args).wanted())
'ASR 9001': 'manufacturer': 'Cisco', 'slug': 'asr-9001' ,
'Catalyst 2960G-48TC-L': 'manufacturer': 'Cisco',
'slug': 'catalyst-2960g-48tc-l' ,
'MX10003': 'manufacturer': 'Juniper', 'slug': 'mx10003' ,
'QFX10002-36Q': 'manufacturer': 'Juniper', 'slug': 'qfx10002-36q' ,
'QFX10002-72Q': 'manufacturer': 'Juniper', 'slug': 'qfx10002-72q' ,
'QFX5110-32Q': 'manufacturer': 'Juniper', 'slug': 'qfx5110-32q' ,
'QFX5110-48S': 'manufacturer': 'Juniper', 'slug': 'qfx5110-48s' ,
'QFX5200-32C': 'manufacturer': 'Juniper', 'slug': 'qfx5200-32c' ,
'S4048-ON': 'manufacturer': 'Dell', 'slug': 's4048-on' ,
'S6010-ON': 'manufacturer': 'Dell', 'slug': 's6010-on'
The device roles are defined like this:
class SyncDeviceRoles(Synchronizer):
app = "dcim"
table = "device_roles"
key = "name"
def wanted(self):
result = set(details["role"]
for details in self.source['devices'].values()
if "role" in details)
return k: dict(slug=slugify(k),
color="8bc34a")
for k in result
Synchronizing devices
A device is mostly a name with references to a role, a model, a
datacenter and a tenant. These references are declared as foreign keys
using the synchronizers defined previously.
class SyncDevices(Synchronizer):
app = "dcim"
table = "devices"
key = "name"
foreign = "device_role": SyncDeviceRoles,
"device_type": SyncDeviceTypes,
"site": SyncSites,
"tenant": SyncTenants
remove_unused = 10
def wanted(self):
return name: dict(device_role=details["role"],
device_type=details["model"],
site=details["datacenter"],
tenant="Network")
for name, details in self.source['devices'].items()
if "datacenter", "model", "role" <= set(details.keys())
The remove_unused attribute is a safety implemented to fail if we
have to delete more than 10 devices: this may be the indication there
is a bug somewhere, unless one of your datacenter suddenly caught
fire.
>>> pprint(SyncDevices(**sync_args).wanted())
'ad2-p6.sfo1.example.com': 'device_role': 'net_tor_oob_switch',
'device_type': 'Catalyst 2960G-48TC-L',
'site': 'sfo1',
'tenant': 'Network' ,
'to1-p6.sfo1.example.com': 'device_role': 'net_tor_gpu_switch',
'device_type': 'QFX5110-48S',
'site': 'sfo1',
'tenant': 'Network' ,
[ ]
Synchronizing IP addresses
The last step is to synchronize IP addresses. We do not attach them to
a device.2 Instead, we specify the device names in the
description of the IP address:
class SyncIPs(Synchronizer):
app = "ipam"
table = "ip-addresses"
key = "address"
foreign = "tenant": SyncTenants
remove_unused = 1000
def wanted(self):
wanted =
for details in self.source['ips']:
if details['ip'] in wanted:
wanted[details['ip']]['description'] = \
f" details['device'] (and others)"
else:
wanted[details['ip']] = dict(
tenant="Network",
status="active",
dns_name="", # information is present in DNS
description=f" details['device'] : details['interface'] ",
role=None,
vrf=None)
return wanted
There is a slight difficulty: NetBox allows duplicate IP addresses,
so a simple lookup is not enough. In case of multiple matches, we
choose the best by preferring those tagged with cmdb, then those
already attached to an interface:
def get(self, key):
"""Grab IP address from NetBox."""
# There may be duplicate. We need to grab the "best".
results = super(Synchronizer, self).get(key)
if len(results) == 0:
return None
if len(results) == 1:
return results[0]
scores = [0]*len(results)
for idx, result in enumerate(results):
if "cmdb" in result.tags:
scores[idx] += 10
if result.interface is not None:
scores[idx] += 5
return sorted(zip(scores, results),
reverse=True, key=lambda k: k[0])[0][1]
Getting the current and wanted states
Each synchronizer is initialized with a reference to the Ansible
module, a reference to a pynetbox s API object, the data contained
in the provided YAML file and two empty dictionaries for the current
and expected states:
source = yaml.safe_load(open(module.params['source']))
netbox = pynetbox.api(module.params['api'],
token=module.params['token'])
sync_args = dict(
module=module,
netbox=netbox,
source=source,
before= ,
after=
)
synchronizers = [synchronizer(**sync_args) for synchronizer in [
SyncTags,
SyncTenants,
SyncSites,
SyncManufacturers,
SyncDeviceTypes,
SyncDeviceRoles,
SyncDevices,
SyncIPs
]]
Each synchronizer has a prepare() method whose goal is to compute
the current and wanted states. It returns True in case of a
difference:
# Check what needs to be synchronized
try:
for synchronizer in synchronizers:
result['changed'] = synchronizer.prepare()
except AnsibleError as e:
result['msg'] = e.message
module.fail_json(**result)
Applying changes
Back to the skeleton described in the previous article, the last step is to apply the changes if there
is a difference between these states. Each synchronizer registers the
current and wanted states in sync_args["before"][table] and
sync_args["after"][table] where table is the name of the table for
a given NetBox object type. The diff object is a bit elaborate as
it is built table by table. This enables Ansible to display the name
of each table before the diff representation:
# Compute the diff
if module._diff and result['changed']:
result['diff'] = [
dict(
before_header=table,
after_header=table,
before=yaml.safe_dump(sync_args["before"][table]),
after=yaml.safe_dump(sync_args["after"][table]))
for table in sync_args["after"]
if sync_args["before"][table] != sync_args["after"][table]
]
# Stop here if check mode is enabled or if no change
if module.check_mode or not result['changed']:
module.exit_json(**result)
Each synchronizer also exposes a synchronize() method to apply
changes and a cleanup() method to delete unwanted objects. Order is
important due to the relation between the objects.
# Synchronize
for synchronizer in synchronizers:
synchronizer.synchronize()
for synchronizer in synchronizers[::-1]:
synchronizer.cleanup()
module.exit_json(**result)
The complete code is available on GitHub. Compared to using
netbox.netbox collection, the logic is written in
Python instead of trying to glue Ansible tasks together. I believe
this is both more flexible and easier to read, notably when trying to
delete outdated objects. While I did not test it, it should also be
faster. An alternative would have been to reuse code from the
netbox.netbox collection, as it contains similar primitives.
Unfortunately, I didn t think of it until now.
-
In my opinion, a good option for a source of truth is to
use YAML files in a Git repository. You get versioning for free
and people can get started with a text editor.
-
This limitation is mostly due to laziness: we do not
really care about this information. Our main motivation for
putting IP addresses in NetBox is to keep track of the used IP
addresses. However, if an IP address is already attached to an
interface, we leave this association untouched.
class SyncTags(Synchronizer): app = "extras" table = "tags" key = "name" def wanted(self): return "cmdb": dict( slug="cmdb", color="8bc34a", description="synced by network CMDB")
app and table attributes defines the NetBox objects we want
to manipulate. The key attribute is used to determine how to lookup
for existing objects. In this example, we want to lookup tags using
their names.
The wanted() method is expected to return a dictionary mapping
object keys to the list of wanted attributes. Here, the keys are tag
names and we create only one tag, cmdb, with the provided slug,
color and description. This is the tag we will use to mark the objects
we create or modify.
If the tag does not exist, it is created. If it exists, the provided
attributes are updated. Other attributes are left untouched.
We also want to create a specific tenant for objects accepting such an
attribute (devices and IP addresses):
class SyncTenants(Synchronizer): app = "tenancy" table = "tenants" key = "name" def wanted(self): return "Network": dict(slug="network", description="Network team")
Synchronizing sites
We also need to synchronize the list of sites. This time, the
wanted() method uses the information provided in the YAML file: it
walks the devices and builds a set of datacenter names.
class SyncSites(Synchronizer):
app = "dcim"
table = "sites"
key = "name"
only_on_create = ("status", "slug")
def wanted(self):
result = set(details["datacenter"]
for details in self.source['devices'].values()
if "datacenter" in details)
return k: dict(slug=k,
status="planned")
for k in result
Thanks to the use of the only_on_create attribute, the specified
attributes are not updated if they are different. The goal of this
synchronizer is mostly to collect the references to the different
sites for other objects.
>>> pprint(SyncSites(**sync_args).wanted())
'sfo1': 'slug': 'sfo1', 'status': 'planned' ,
'chi1': 'slug': 'chi1', 'status': 'planned' ,
'nyc1': 'slug': 'nyc1', 'status': 'planned'
Synchronizing manufacturers, device types and device roles
The synchronization of manufacturers is pretty similar, except we do
not use the only_on_create attribute:
class SyncManufacturers(Synchronizer):
app = "dcim"
table = "manufacturers"
key = "name"
def wanted(self):
result = set(details["manufacturer"]
for details in self.source['devices'].values()
if "manufacturer" in details)
return k: "slug": slugify(k)
for k in result
Regarding the device types, we use the foreign attribute linking
a NetBox attribute to the synchronizer handling it.
class SyncDeviceTypes(Synchronizer):
app = "dcim"
table = "device_types"
key = "model"
foreign = "manufacturer": SyncManufacturers
def wanted(self):
result = set((details["manufacturer"], details["model"])
for details in self.source['devices'].values()
if "model" in details)
return k[1]: dict(manufacturer=k[0],
slug=slugify(k[1]))
for k in result
The wanted() method refers to the manufacturer using its key
attribute. In this case, this is the manufacturer name.
>>> pprint(SyncManufacturers(**sync_args).wanted())
'Cisco': 'slug': 'cisco' ,
'Dell': 'slug': 'dell' ,
'Juniper': 'slug': 'juniper'
>>> pprint(SyncDeviceTypes(**sync_args).wanted())
'ASR 9001': 'manufacturer': 'Cisco', 'slug': 'asr-9001' ,
'Catalyst 2960G-48TC-L': 'manufacturer': 'Cisco',
'slug': 'catalyst-2960g-48tc-l' ,
'MX10003': 'manufacturer': 'Juniper', 'slug': 'mx10003' ,
'QFX10002-36Q': 'manufacturer': 'Juniper', 'slug': 'qfx10002-36q' ,
'QFX10002-72Q': 'manufacturer': 'Juniper', 'slug': 'qfx10002-72q' ,
'QFX5110-32Q': 'manufacturer': 'Juniper', 'slug': 'qfx5110-32q' ,
'QFX5110-48S': 'manufacturer': 'Juniper', 'slug': 'qfx5110-48s' ,
'QFX5200-32C': 'manufacturer': 'Juniper', 'slug': 'qfx5200-32c' ,
'S4048-ON': 'manufacturer': 'Dell', 'slug': 's4048-on' ,
'S6010-ON': 'manufacturer': 'Dell', 'slug': 's6010-on'
The device roles are defined like this:
class SyncDeviceRoles(Synchronizer):
app = "dcim"
table = "device_roles"
key = "name"
def wanted(self):
result = set(details["role"]
for details in self.source['devices'].values()
if "role" in details)
return k: dict(slug=slugify(k),
color="8bc34a")
for k in result
Synchronizing devices
A device is mostly a name with references to a role, a model, a
datacenter and a tenant. These references are declared as foreign keys
using the synchronizers defined previously.
class SyncDevices(Synchronizer):
app = "dcim"
table = "devices"
key = "name"
foreign = "device_role": SyncDeviceRoles,
"device_type": SyncDeviceTypes,
"site": SyncSites,
"tenant": SyncTenants
remove_unused = 10
def wanted(self):
return name: dict(device_role=details["role"],
device_type=details["model"],
site=details["datacenter"],
tenant="Network")
for name, details in self.source['devices'].items()
if "datacenter", "model", "role" <= set(details.keys())
The remove_unused attribute is a safety implemented to fail if we
have to delete more than 10 devices: this may be the indication there
is a bug somewhere, unless one of your datacenter suddenly caught
fire.
>>> pprint(SyncDevices(**sync_args).wanted())
'ad2-p6.sfo1.example.com': 'device_role': 'net_tor_oob_switch',
'device_type': 'Catalyst 2960G-48TC-L',
'site': 'sfo1',
'tenant': 'Network' ,
'to1-p6.sfo1.example.com': 'device_role': 'net_tor_gpu_switch',
'device_type': 'QFX5110-48S',
'site': 'sfo1',
'tenant': 'Network' ,
[ ]
Synchronizing IP addresses
The last step is to synchronize IP addresses. We do not attach them to
a device.2 Instead, we specify the device names in the
description of the IP address:
class SyncIPs(Synchronizer):
app = "ipam"
table = "ip-addresses"
key = "address"
foreign = "tenant": SyncTenants
remove_unused = 1000
def wanted(self):
wanted =
for details in self.source['ips']:
if details['ip'] in wanted:
wanted[details['ip']]['description'] = \
f" details['device'] (and others)"
else:
wanted[details['ip']] = dict(
tenant="Network",
status="active",
dns_name="", # information is present in DNS
description=f" details['device'] : details['interface'] ",
role=None,
vrf=None)
return wanted
There is a slight difficulty: NetBox allows duplicate IP addresses,
so a simple lookup is not enough. In case of multiple matches, we
choose the best by preferring those tagged with cmdb, then those
already attached to an interface:
def get(self, key):
"""Grab IP address from NetBox."""
# There may be duplicate. We need to grab the "best".
results = super(Synchronizer, self).get(key)
if len(results) == 0:
return None
if len(results) == 1:
return results[0]
scores = [0]*len(results)
for idx, result in enumerate(results):
if "cmdb" in result.tags:
scores[idx] += 10
if result.interface is not None:
scores[idx] += 5
return sorted(zip(scores, results),
reverse=True, key=lambda k: k[0])[0][1]
Getting the current and wanted states
Each synchronizer is initialized with a reference to the Ansible
module, a reference to a pynetbox s API object, the data contained
in the provided YAML file and two empty dictionaries for the current
and expected states:
source = yaml.safe_load(open(module.params['source']))
netbox = pynetbox.api(module.params['api'],
token=module.params['token'])
sync_args = dict(
module=module,
netbox=netbox,
source=source,
before= ,
after=
)
synchronizers = [synchronizer(**sync_args) for synchronizer in [
SyncTags,
SyncTenants,
SyncSites,
SyncManufacturers,
SyncDeviceTypes,
SyncDeviceRoles,
SyncDevices,
SyncIPs
]]
Each synchronizer has a prepare() method whose goal is to compute
the current and wanted states. It returns True in case of a
difference:
# Check what needs to be synchronized
try:
for synchronizer in synchronizers:
result['changed'] = synchronizer.prepare()
except AnsibleError as e:
result['msg'] = e.message
module.fail_json(**result)
Applying changes
Back to the skeleton described in the previous article, the last step is to apply the changes if there
is a difference between these states. Each synchronizer registers the
current and wanted states in sync_args["before"][table] and
sync_args["after"][table] where table is the name of the table for
a given NetBox object type. The diff object is a bit elaborate as
it is built table by table. This enables Ansible to display the name
of each table before the diff representation:
# Compute the diff
if module._diff and result['changed']:
result['diff'] = [
dict(
before_header=table,
after_header=table,
before=yaml.safe_dump(sync_args["before"][table]),
after=yaml.safe_dump(sync_args["after"][table]))
for table in sync_args["after"]
if sync_args["before"][table] != sync_args["after"][table]
]
# Stop here if check mode is enabled or if no change
if module.check_mode or not result['changed']:
module.exit_json(**result)
Each synchronizer also exposes a synchronize() method to apply
changes and a cleanup() method to delete unwanted objects. Order is
important due to the relation between the objects.
# Synchronize
for synchronizer in synchronizers:
synchronizer.synchronize()
for synchronizer in synchronizers[::-1]:
synchronizer.cleanup()
module.exit_json(**result)
The complete code is available on GitHub. Compared to using
netbox.netbox collection, the logic is written in
Python instead of trying to glue Ansible tasks together. I believe
this is both more flexible and easier to read, notably when trying to
delete outdated objects. While I did not test it, it should also be
faster. An alternative would have been to reuse code from the
netbox.netbox collection, as it contains similar primitives.
Unfortunately, I didn t think of it until now.
-
In my opinion, a good option for a source of truth is to
use YAML files in a Git repository. You get versioning for free
and people can get started with a text editor.
-
This limitation is mostly due to laziness: we do not
really care about this information. Our main motivation for
putting IP addresses in NetBox is to keep track of the used IP
addresses. However, if an IP address is already attached to an
interface, we leave this association untouched.
class SyncSites(Synchronizer): app = "dcim" table = "sites" key = "name" only_on_create = ("status", "slug") def wanted(self): result = set(details["datacenter"] for details in self.source['devices'].values() if "datacenter" in details) return k: dict(slug=k, status="planned") for k in result
>>> pprint(SyncSites(**sync_args).wanted()) 'sfo1': 'slug': 'sfo1', 'status': 'planned' , 'chi1': 'slug': 'chi1', 'status': 'planned' , 'nyc1': 'slug': 'nyc1', 'status': 'planned'
only_on_create attribute:
class SyncManufacturers(Synchronizer): app = "dcim" table = "manufacturers" key = "name" def wanted(self): result = set(details["manufacturer"] for details in self.source['devices'].values() if "manufacturer" in details) return k: "slug": slugify(k) for k in result
foreign attribute linking
a NetBox attribute to the synchronizer handling it.
class SyncDeviceTypes(Synchronizer): app = "dcim" table = "device_types" key = "model" foreign = "manufacturer": SyncManufacturers def wanted(self): result = set((details["manufacturer"], details["model"]) for details in self.source['devices'].values() if "model" in details) return k[1]: dict(manufacturer=k[0], slug=slugify(k[1])) for k in result
wanted() method refers to the manufacturer using its key
attribute. In this case, this is the manufacturer name.
>>> pprint(SyncManufacturers(**sync_args).wanted()) 'Cisco': 'slug': 'cisco' , 'Dell': 'slug': 'dell' , 'Juniper': 'slug': 'juniper' >>> pprint(SyncDeviceTypes(**sync_args).wanted()) 'ASR 9001': 'manufacturer': 'Cisco', 'slug': 'asr-9001' , 'Catalyst 2960G-48TC-L': 'manufacturer': 'Cisco', 'slug': 'catalyst-2960g-48tc-l' , 'MX10003': 'manufacturer': 'Juniper', 'slug': 'mx10003' , 'QFX10002-36Q': 'manufacturer': 'Juniper', 'slug': 'qfx10002-36q' , 'QFX10002-72Q': 'manufacturer': 'Juniper', 'slug': 'qfx10002-72q' , 'QFX5110-32Q': 'manufacturer': 'Juniper', 'slug': 'qfx5110-32q' , 'QFX5110-48S': 'manufacturer': 'Juniper', 'slug': 'qfx5110-48s' , 'QFX5200-32C': 'manufacturer': 'Juniper', 'slug': 'qfx5200-32c' , 'S4048-ON': 'manufacturer': 'Dell', 'slug': 's4048-on' , 'S6010-ON': 'manufacturer': 'Dell', 'slug': 's6010-on'
class SyncDeviceRoles(Synchronizer): app = "dcim" table = "device_roles" key = "name" def wanted(self): result = set(details["role"] for details in self.source['devices'].values() if "role" in details) return k: dict(slug=slugify(k), color="8bc34a") for k in result
Synchronizing devices
A device is mostly a name with references to a role, a model, a
datacenter and a tenant. These references are declared as foreign keys
using the synchronizers defined previously.
class SyncDevices(Synchronizer):
app = "dcim"
table = "devices"
key = "name"
foreign = "device_role": SyncDeviceRoles,
"device_type": SyncDeviceTypes,
"site": SyncSites,
"tenant": SyncTenants
remove_unused = 10
def wanted(self):
return name: dict(device_role=details["role"],
device_type=details["model"],
site=details["datacenter"],
tenant="Network")
for name, details in self.source['devices'].items()
if "datacenter", "model", "role" <= set(details.keys())
The remove_unused attribute is a safety implemented to fail if we
have to delete more than 10 devices: this may be the indication there
is a bug somewhere, unless one of your datacenter suddenly caught
fire.
>>> pprint(SyncDevices(**sync_args).wanted())
'ad2-p6.sfo1.example.com': 'device_role': 'net_tor_oob_switch',
'device_type': 'Catalyst 2960G-48TC-L',
'site': 'sfo1',
'tenant': 'Network' ,
'to1-p6.sfo1.example.com': 'device_role': 'net_tor_gpu_switch',
'device_type': 'QFX5110-48S',
'site': 'sfo1',
'tenant': 'Network' ,
[ ]
Synchronizing IP addresses
The last step is to synchronize IP addresses. We do not attach them to
a device.2 Instead, we specify the device names in the
description of the IP address:
class SyncIPs(Synchronizer):
app = "ipam"
table = "ip-addresses"
key = "address"
foreign = "tenant": SyncTenants
remove_unused = 1000
def wanted(self):
wanted =
for details in self.source['ips']:
if details['ip'] in wanted:
wanted[details['ip']]['description'] = \
f" details['device'] (and others)"
else:
wanted[details['ip']] = dict(
tenant="Network",
status="active",
dns_name="", # information is present in DNS
description=f" details['device'] : details['interface'] ",
role=None,
vrf=None)
return wanted
There is a slight difficulty: NetBox allows duplicate IP addresses,
so a simple lookup is not enough. In case of multiple matches, we
choose the best by preferring those tagged with cmdb, then those
already attached to an interface:
def get(self, key):
"""Grab IP address from NetBox."""
# There may be duplicate. We need to grab the "best".
results = super(Synchronizer, self).get(key)
if len(results) == 0:
return None
if len(results) == 1:
return results[0]
scores = [0]*len(results)
for idx, result in enumerate(results):
if "cmdb" in result.tags:
scores[idx] += 10
if result.interface is not None:
scores[idx] += 5
return sorted(zip(scores, results),
reverse=True, key=lambda k: k[0])[0][1]
Getting the current and wanted states
Each synchronizer is initialized with a reference to the Ansible
module, a reference to a pynetbox s API object, the data contained
in the provided YAML file and two empty dictionaries for the current
and expected states:
source = yaml.safe_load(open(module.params['source']))
netbox = pynetbox.api(module.params['api'],
token=module.params['token'])
sync_args = dict(
module=module,
netbox=netbox,
source=source,
before= ,
after=
)
synchronizers = [synchronizer(**sync_args) for synchronizer in [
SyncTags,
SyncTenants,
SyncSites,
SyncManufacturers,
SyncDeviceTypes,
SyncDeviceRoles,
SyncDevices,
SyncIPs
]]
Each synchronizer has a prepare() method whose goal is to compute
the current and wanted states. It returns True in case of a
difference:
# Check what needs to be synchronized
try:
for synchronizer in synchronizers:
result['changed'] = synchronizer.prepare()
except AnsibleError as e:
result['msg'] = e.message
module.fail_json(**result)
Applying changes
Back to the skeleton described in the previous article, the last step is to apply the changes if there
is a difference between these states. Each synchronizer registers the
current and wanted states in sync_args["before"][table] and
sync_args["after"][table] where table is the name of the table for
a given NetBox object type. The diff object is a bit elaborate as
it is built table by table. This enables Ansible to display the name
of each table before the diff representation:
# Compute the diff
if module._diff and result['changed']:
result['diff'] = [
dict(
before_header=table,
after_header=table,
before=yaml.safe_dump(sync_args["before"][table]),
after=yaml.safe_dump(sync_args["after"][table]))
for table in sync_args["after"]
if sync_args["before"][table] != sync_args["after"][table]
]
# Stop here if check mode is enabled or if no change
if module.check_mode or not result['changed']:
module.exit_json(**result)
Each synchronizer also exposes a synchronize() method to apply
changes and a cleanup() method to delete unwanted objects. Order is
important due to the relation between the objects.
# Synchronize
for synchronizer in synchronizers:
synchronizer.synchronize()
for synchronizer in synchronizers[::-1]:
synchronizer.cleanup()
module.exit_json(**result)
The complete code is available on GitHub. Compared to using
netbox.netbox collection, the logic is written in
Python instead of trying to glue Ansible tasks together. I believe
this is both more flexible and easier to read, notably when trying to
delete outdated objects. While I did not test it, it should also be
faster. An alternative would have been to reuse code from the
netbox.netbox collection, as it contains similar primitives.
Unfortunately, I didn t think of it until now.
-
In my opinion, a good option for a source of truth is to
use YAML files in a Git repository. You get versioning for free
and people can get started with a text editor.
-
This limitation is mostly due to laziness: we do not
really care about this information. Our main motivation for
putting IP addresses in NetBox is to keep track of the used IP
addresses. However, if an IP address is already attached to an
interface, we leave this association untouched.
class SyncDevices(Synchronizer): app = "dcim" table = "devices" key = "name" foreign = "device_role": SyncDeviceRoles, "device_type": SyncDeviceTypes, "site": SyncSites, "tenant": SyncTenants remove_unused = 10 def wanted(self): return name: dict(device_role=details["role"], device_type=details["model"], site=details["datacenter"], tenant="Network") for name, details in self.source['devices'].items() if "datacenter", "model", "role" <= set(details.keys())
>>> pprint(SyncDevices(**sync_args).wanted()) 'ad2-p6.sfo1.example.com': 'device_role': 'net_tor_oob_switch', 'device_type': 'Catalyst 2960G-48TC-L', 'site': 'sfo1', 'tenant': 'Network' , 'to1-p6.sfo1.example.com': 'device_role': 'net_tor_gpu_switch', 'device_type': 'QFX5110-48S', 'site': 'sfo1', 'tenant': 'Network' , [ ]
class SyncIPs(Synchronizer): app = "ipam" table = "ip-addresses" key = "address" foreign = "tenant": SyncTenants remove_unused = 1000 def wanted(self): wanted = for details in self.source['ips']: if details['ip'] in wanted: wanted[details['ip']]['description'] = \ f" details['device'] (and others)" else: wanted[details['ip']] = dict( tenant="Network", status="active", dns_name="", # information is present in DNS description=f" details['device'] : details['interface'] ", role=None, vrf=None) return wanted
cmdb, then those
already attached to an interface:
def get(self, key): """Grab IP address from NetBox.""" # There may be duplicate. We need to grab the "best". results = super(Synchronizer, self).get(key) if len(results) == 0: return None if len(results) == 1: return results[0] scores = [0]*len(results) for idx, result in enumerate(results): if "cmdb" in result.tags: scores[idx] += 10 if result.interface is not None: scores[idx] += 5 return sorted(zip(scores, results), reverse=True, key=lambda k: k[0])[0][1]
Getting the current and wanted states
Each synchronizer is initialized with a reference to the Ansible
module, a reference to a pynetbox s API object, the data contained
in the provided YAML file and two empty dictionaries for the current
and expected states:
source = yaml.safe_load(open(module.params['source']))
netbox = pynetbox.api(module.params['api'],
token=module.params['token'])
sync_args = dict(
module=module,
netbox=netbox,
source=source,
before= ,
after=
)
synchronizers = [synchronizer(**sync_args) for synchronizer in [
SyncTags,
SyncTenants,
SyncSites,
SyncManufacturers,
SyncDeviceTypes,
SyncDeviceRoles,
SyncDevices,
SyncIPs
]]
Each synchronizer has a prepare() method whose goal is to compute
the current and wanted states. It returns True in case of a
difference:
# Check what needs to be synchronized
try:
for synchronizer in synchronizers:
result['changed'] = synchronizer.prepare()
except AnsibleError as e:
result['msg'] = e.message
module.fail_json(**result)
Applying changes
Back to the skeleton described in the previous article, the last step is to apply the changes if there
is a difference between these states. Each synchronizer registers the
current and wanted states in sync_args["before"][table] and
sync_args["after"][table] where table is the name of the table for
a given NetBox object type. The diff object is a bit elaborate as
it is built table by table. This enables Ansible to display the name
of each table before the diff representation:
# Compute the diff
if module._diff and result['changed']:
result['diff'] = [
dict(
before_header=table,
after_header=table,
before=yaml.safe_dump(sync_args["before"][table]),
after=yaml.safe_dump(sync_args["after"][table]))
for table in sync_args["after"]
if sync_args["before"][table] != sync_args["after"][table]
]
# Stop here if check mode is enabled or if no change
if module.check_mode or not result['changed']:
module.exit_json(**result)
Each synchronizer also exposes a synchronize() method to apply
changes and a cleanup() method to delete unwanted objects. Order is
important due to the relation between the objects.
# Synchronize
for synchronizer in synchronizers:
synchronizer.synchronize()
for synchronizer in synchronizers[::-1]:
synchronizer.cleanup()
module.exit_json(**result)
The complete code is available on GitHub. Compared to using
netbox.netbox collection, the logic is written in
Python instead of trying to glue Ansible tasks together. I believe
this is both more flexible and easier to read, notably when trying to
delete outdated objects. While I did not test it, it should also be
faster. An alternative would have been to reuse code from the
netbox.netbox collection, as it contains similar primitives.
Unfortunately, I didn t think of it until now.
-
In my opinion, a good option for a source of truth is to
use YAML files in a Git repository. You get versioning for free
and people can get started with a text editor.
-
This limitation is mostly due to laziness: we do not
really care about this information. Our main motivation for
putting IP addresses in NetBox is to keep track of the used IP
addresses. However, if an IP address is already attached to an
interface, we leave this association untouched.
source = yaml.safe_load(open(module.params['source'])) netbox = pynetbox.api(module.params['api'], token=module.params['token']) sync_args = dict( module=module, netbox=netbox, source=source, before= , after= ) synchronizers = [synchronizer(**sync_args) for synchronizer in [ SyncTags, SyncTenants, SyncSites, SyncManufacturers, SyncDeviceTypes, SyncDeviceRoles, SyncDevices, SyncIPs ]]
# Check what needs to be synchronized try: for synchronizer in synchronizers: result['changed'] = synchronizer.prepare() except AnsibleError as e: result['msg'] = e.message module.fail_json(**result)
sync_args["before"][table] and
sync_args["after"][table] where table is the name of the table for
a given NetBox object type. The diff object is a bit elaborate as
it is built table by table. This enables Ansible to display the name
of each table before the diff representation:
# Compute the diff if module._diff and result['changed']: result['diff'] = [ dict( before_header=table, after_header=table, before=yaml.safe_dump(sync_args["before"][table]), after=yaml.safe_dump(sync_args["after"][table])) for table in sync_args["after"] if sync_args["before"][table] != sync_args["after"][table] ] # Stop here if check mode is enabled or if no change if module.check_mode or not result['changed']: module.exit_json(**result)
synchronize() method to apply
changes and a cleanup() method to delete unwanted objects. Order is
important due to the relation between the objects.
# Synchronize for synchronizer in synchronizers: synchronizer.synchronize() for synchronizer in synchronizers[::-1]: synchronizer.cleanup() module.exit_json(**result)
The complete code is available on GitHub. Compared to using
netbox.netbox collection, the logic is written in
Python instead of trying to glue Ansible tasks together. I believe
this is both more flexible and easier to read, notably when trying to
delete outdated objects. While I did not test it, it should also be
faster. An alternative would have been to reuse code from the
netbox.netbox collection, as it contains similar primitives.
Unfortunately, I didn t think of it until now.
- In my opinion, a good option for a source of truth is to use YAML files in a Git repository. You get versioning for free and people can get started with a text editor.
- This limitation is mostly due to laziness: we do not really care about this information. Our main motivation for putting IP addresses in NetBox is to keep track of the used IP addresses. However, if an IP address is already attached to an interface, we leave this association untouched.


 Welcome to gambaru.de. Here is my monthly report that covers what I have been doing for Debian. If you re interested in Java, Games and LTS topics, this might be interesting for you.
Debian Games
Welcome to gambaru.de. Here is my monthly report that covers what I have been doing for Debian. If you re interested in Java, Games and LTS topics, this might be interesting for you.
Debian Games
 A common way to establish an IPsec tunnel on Linux is to use an
  A possible configuration between
  For more in-depth explanation on the different ways to encode a routing table
into a trie and a better understanding of radix trees, see
the
For more in-depth explanation on the different ways to encode a routing table
into a trie and a better understanding of radix trees, see
the  The
The  Getting meaningful results is challenging due to the size of the address
space. None of the scenarios have a fallback route and we only measure time for
successful hits
Getting meaningful results is challenging due to the size of the address
space. None of the scenarios have a fallback route and we only measure time for
successful hits. The graph is interactive.") Only 50% of the time is spent in the actual route lookup. The remaining time is
spent evaluating the routing rules (about 30 ns). This ratio is dependent on the
number of routes we inserted (only 1000 in this example). It should be noted the
Only 50% of the time is spent in the actual route lookup. The remaining time is
spent evaluating the routing rules (about 30 ns). This ratio is dependent on the
number of routes we inserted (only 1000 in this example). It should be noted the
. The graph is interactive.") Here is an approximate breakdown on the time spent:
Here is an approximate breakdown on the time spent:
 All kernels are compiled with
  for a given number of routes. The x-axis scale is logarithmic. The blue line is a linear regression.") Despite its more complex insertion logic, the IPv4 subsystem is able to insert 2
million routes in less than 10 seconds.
Despite its more complex insertion logic, the IPv4 subsystem is able to insert 2
million routes in less than 10 seconds.
 The memory usage is therefore quite predictable and reasonable, as even a small
single-board computer can support several full views (20 MiB for each):
The memory usage is therefore quite predictable and reasonable, as even a small
single-board computer can support several full views (20 MiB for each):
 The
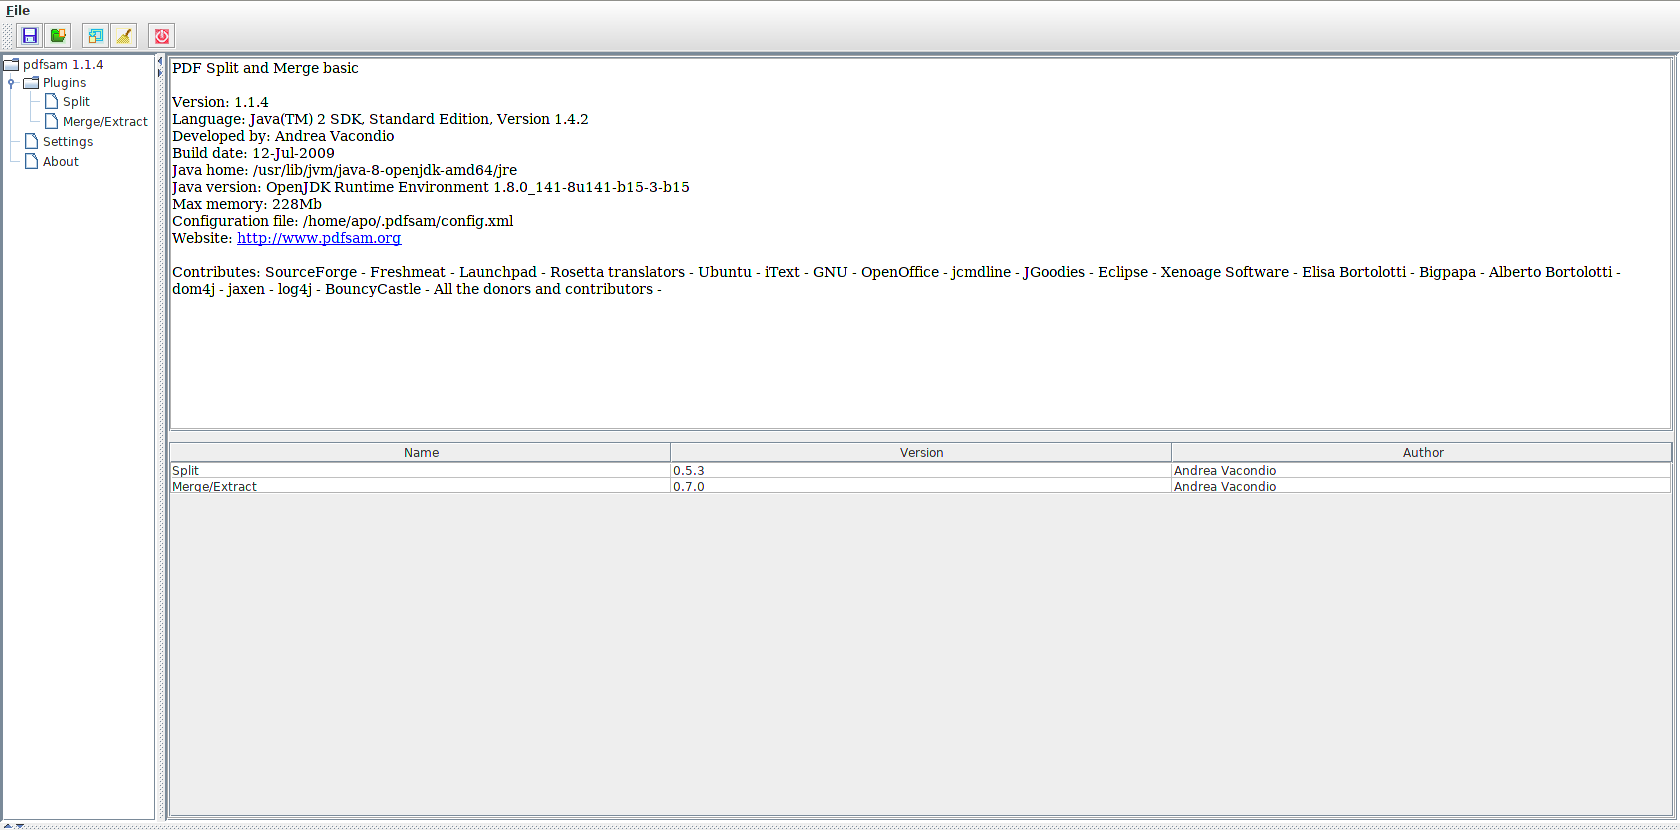
The  Ok, what is happening here? First you can choose a source and binary package name. Then disable the tests and don t run javadoc to create the documentation. This will simplify things a little. Tests and javadoc settings can be added later. Choose the version you want to package and then you can basically follow the default recommendations and confirm them by hitting the Enter key. Throughout the project we choose to transform the upstream version with the symbolic debian version. Remember that Java/Maven is version-centric. This will ensure that our Maven dependencies are always satisfied later and we can simply upgrade our Maven libraries and don t have to change the versions by hand in various pom.xml files; maven-debian-helper will automatically transform them for us to debian . Enable all modules. If you choose not to, you can select each module individually. Note that later on some of the required build-dependencies cannot be found because they are either not installed (libjmagick6-java) or they cannot be found in Debian s Maven repository under /usr/share/maven-repo. You can fix this by entering a substitution rule or, as I did in this case, you can just ignore these artifacts for now. They will be added to maven.IgnoreRules. In order to successfully compile your program you have to remove them from this file later again, create the correct substitution rule in maven.rules and add the missing build-dependencies to debian/control. For now we just want to quickly create our initial debian directory.
If everything went as planned a complete debian directory should be visible in your root directory. The only thing left is to fix the substitution rule for the Servlet API 3.1. Add libservlet3.1-java to Build-Depends and the following rule to maven.rules:
Ok, what is happening here? First you can choose a source and binary package name. Then disable the tests and don t run javadoc to create the documentation. This will simplify things a little. Tests and javadoc settings can be added later. Choose the version you want to package and then you can basically follow the default recommendations and confirm them by hitting the Enter key. Throughout the project we choose to transform the upstream version with the symbolic debian version. Remember that Java/Maven is version-centric. This will ensure that our Maven dependencies are always satisfied later and we can simply upgrade our Maven libraries and don t have to change the versions by hand in various pom.xml files; maven-debian-helper will automatically transform them for us to debian . Enable all modules. If you choose not to, you can select each module individually. Note that later on some of the required build-dependencies cannot be found because they are either not installed (libjmagick6-java) or they cannot be found in Debian s Maven repository under /usr/share/maven-repo. You can fix this by entering a substitution rule or, as I did in this case, you can just ignore these artifacts for now. They will be added to maven.IgnoreRules. In order to successfully compile your program you have to remove them from this file later again, create the correct substitution rule in maven.rules and add the missing build-dependencies to debian/control. For now we just want to quickly create our initial debian directory.
If everything went as planned a complete debian directory should be visible in your root directory. The only thing left is to fix the substitution rule for the Servlet API 3.1. Add libservlet3.1-java to Build-Depends and the following rule to maven.rules:
 You can just use an asterisk to match any value. Every value can be substituted. This is necessary when the value of upstream s pom.xml file differs from Debian s system packages. This happens frequently for API packages which are uploaded to Maven Central multiple times under a different groupId/artifactId but provide the same features. In this case the Twelvemonkeys pom requires an older API version but Debian is already at version 3.1. Note that we require a strict version number in this case because libservlet3.1-java does not use a symbolic debian version since we provide more than one Servlet API in the archive and this measure prevents conflicts.
Thanks for reading this far. More articles about Java packaging will follow in the near future and hopefully they will clarify some terms and topics which could only be briefly mentioned in this post.
You can just use an asterisk to match any value. Every value can be substituted. This is necessary when the value of upstream s pom.xml file differs from Debian s system packages. This happens frequently for API packages which are uploaded to Maven Central multiple times under a different groupId/artifactId but provide the same features. In this case the Twelvemonkeys pom requires an older API version but Debian is already at version 3.1. Note that we require a strict version number in this case because libservlet3.1-java does not use a symbolic debian version since we provide more than one Servlet API in the archive and this measure prevents conflicts.
Thanks for reading this far. More articles about Java packaging will follow in the near future and hopefully they will clarify some terms and topics which could only be briefly mentioned in this post.
 Two scenarios are tested:
 For each node, the prefix is known by its path from the root node and
the prefix length is the current depth.
A lookup in such a trie is quite simple: at each step, fetch the
nth bit of the
For each node, the prefix is known by its path from the root node and
the prefix length is the current depth.
A lookup in such a trie is quite simple: at each step, fetch the
nth bit of the  Since some bits have been ignored, on a match, a final check is
executed to ensure all bits from the found entry are matching the
input
Since some bits have been ignored, on a match, a final check is
executed to ensure all bits from the found entry are matching the
input  The reduction on the average depth of the tree compensates the
necessity to handle those false positives. The insertion and deletion
of a routing entry is still easy enough.
Many routing systems are using Patricia trees:
The reduction on the average depth of the tree compensates the
necessity to handle those false positives. The insertion and deletion
of a routing entry is still easy enough.
Many routing systems are using Patricia trees:
 Such a trie is called
  There are several structures involved:

 The lookup time is loosely tied to the maximum depth. When the routing
table is densily populated, the maximum depth is low and the lookup
times are fast.
When forwarding at 10 Gbps, the time budget for a packet would be
about 50 ns. Since this is also the time needed for the route lookup
alone in some cases, we wouldn t be able to forward at line rate with
only one core. Nonetheless, the results are pretty good and they are
expected to scale linearly with the number of cores.
The measurements are done with a Linux kernel 4.11 from Debian
unstable. I have gathered performance metrics accross kernel versions
in
The lookup time is loosely tied to the maximum depth. When the routing
table is densily populated, the maximum depth is low and the lookup
times are fast.
When forwarding at 10 Gbps, the time budget for a packet would be
about 50 ns. Since this is also the time needed for the route lookup
alone in some cases, we wouldn t be able to forward at line rate with
only one core. Nonetheless, the results are pretty good and they are
expected to scale linearly with the number of cores.
The measurements are done with a Linux kernel 4.11 from Debian
unstable. I have gathered performance metrics accross kernel versions
in  for a given number of routes (linear). The x-axis scale is logarithmic. The blue line is a linear regression.")
. The x-axis cale is logarithmic. The blue line is a linear regression.") The results are quite good. With only 256 MiB, about 2 million routes
can be stored!
The results are quite good. With only 256 MiB, about 2 million routes
can be stored!
 For some reason, the relation is linear when the number of rules is
between 1 and 100 but the slope increases noticeably past this
threshold. The second graph highlights the negative impact of the
first rule (about 30 ns).
A common use of rules is to create virtual routers: interfaces
are segregated into domains and when a datagram enters through an
interface from domain A, it should use routing table A:
For some reason, the relation is linear when the number of rules is
between 1 and 100 but the slope increases noticeably past this
threshold. The second graph highlights the negative impact of the
first rule (about 30 ns).
A common use of rules is to create virtual routers: interfaces
are segregated into domains and when a datagram enters through an
interface from domain A, it should use routing table A:
 In the above example, we have hypervisors hosting a virtual
machines from different tenants. Each virtual machine is given
access to a tenant-specific virtual Ethernet segment. Users are
expecting classic Ethernet segments: no
In the above example, we have hypervisors hosting a virtual
machines from different tenants. Each virtual machine is given
access to a tenant-specific virtual Ethernet segment. Users are
expecting classic Ethernet segments: no  Compared to
  VXLANs can be provisioned with the following script. Source-address
learning is disabled as we will rely solely on
VXLANs can be provisioned with the following script. Source-address
learning is disabled as we will rely solely on  To illustrate our examples, we use the following setup:
 The
The ")
 The main expectation of such a setup is that while the virtual hosts
should be able to use resources from the public network, they should
not be able to access resources from the infrastructure network
(including resources hosted on the hypervisor itself, like a
The main expectation of such a setup is that while the virtual hosts
should be able to use resources from the public network, they should
not be able to access resources from the infrastructure network
(including resources hosted on the hypervisor itself, like a